NodeMCU WiFi & Lock Status Indicator
APK Download • WiFi Setup • LED Indicators • Servo Lock Control
Hardware Components
- NodeMCU ESP8266
- 3 LEDs (Red, Green, Yellow)
- 3 × 330Ω Resistors
- 1 × Servo Motor (for Lock Mechanism)
- Breadboard & Jumper Wires
- 5V Power Supply
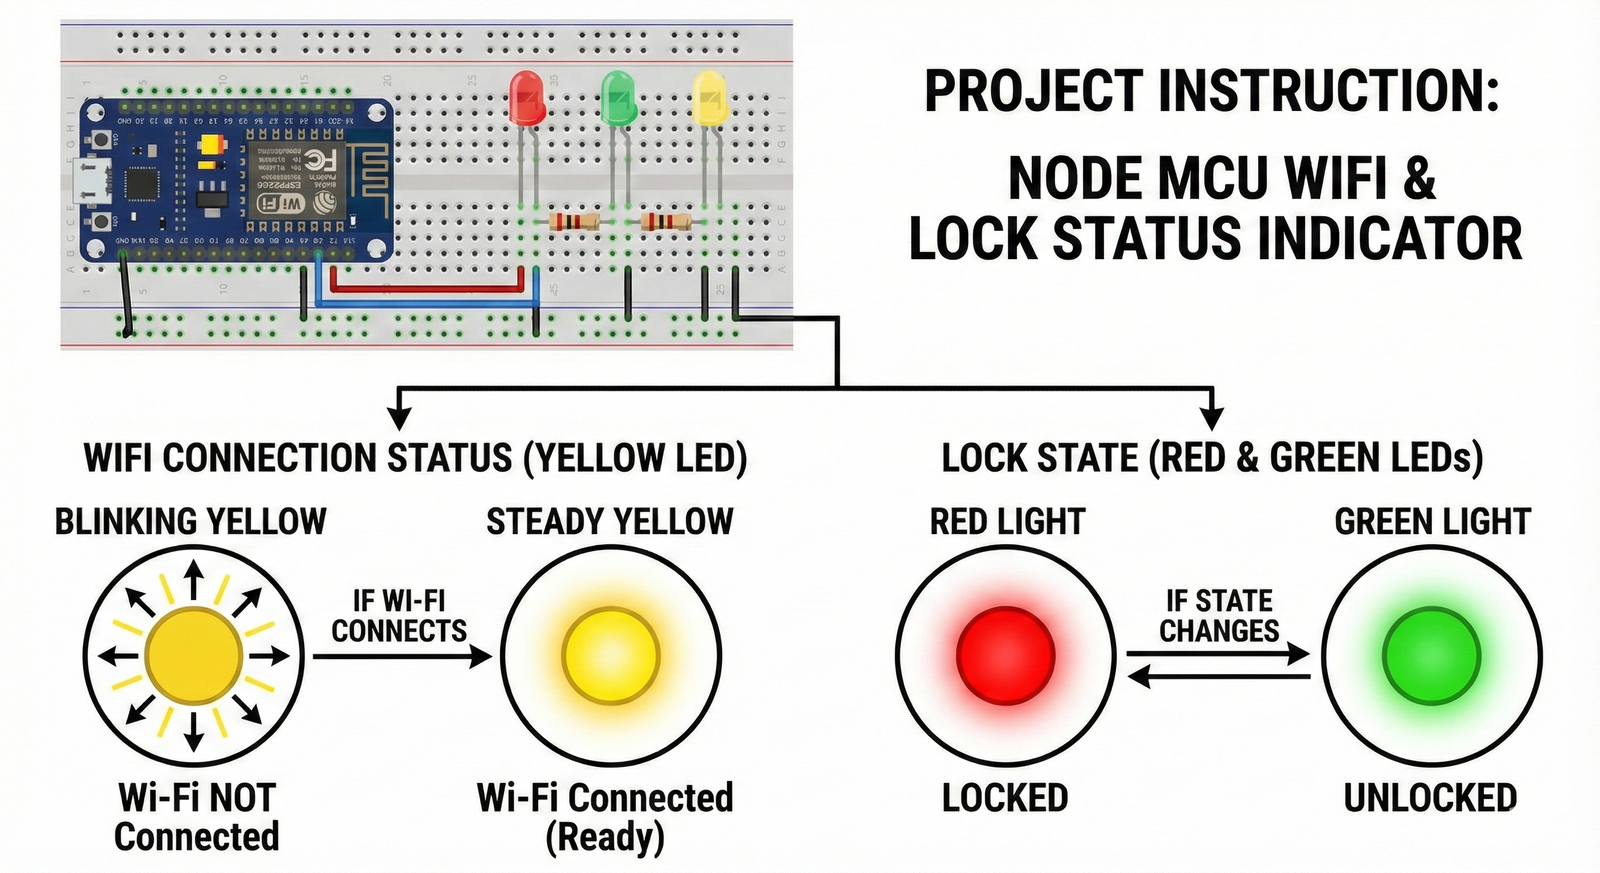
LED Indicator Functions
-
🟡 Yellow LED (WiFi Status)
• Blinking → WiFi NOT connected
• Steady ON → WiFi Connected (Ready) -
🔴 Red LED (Locked)
• ON → Door is LOCKED
• OFF → Door is not locked -
🟢 Green LED (Unlocked)
• ON → Door is UNLOCKED
• OFF → Door is not unlocked
Servo Motor Lock Mechanism
- The servo motor is attached to the physical door latch.
- When the app sends a LOCK command, the servo rotates to the lock position.
- When the app sends an UNLOCK command, the servo rotates to the unlock position.
- The servo is powered using a stable 5V supply.
WiFi Hotspot Setup
-
WiFi Name (SSID):
DoorLockWifi
Password:PassW34d2020
• Turn ON the hotspot before powering the NodeMCU.
• The NodeMCU will automatically connect to this WiFi.
Mobile App Instructions
-
1. Install the APK
Download and install the APK from the button above. -
2. Enter Security PIN
PIN Code: 1234 -
3. Manual Control
• Tap Lock → Servo locks, Red LED ON
• Tap Unlock → Servo unlocks, Green LED ON -
4. Location-Based Control
Enable Auto Lock/Unlock in Settings.
Use Update Home Location to save lock location.
Always verify that the Yellow LED is steady before using the locking system.